Volvo@Ikea

Volvo@Ikea
This blog documents my Volvo 1800E project car; It may be of little interest to others but serves as an electronic logbook. I will also use it to document our travels in this car.

Sunday, November 29, 2015

Tool roll

After getting stranded and realizing that I had no tools in the car, I decided that I had better put a cheap tool kit together.

I purchased this tool roll for on sale $4.99 at Menards.

While adjusting the fuel pressure regulator, I found out that it uses metric hardware (M10 bolt head with a M13 jam nut).  I wonder what else is non-SAE on this old car...


Saturday, November 28, 2015

Stalled in West Chicago

I took the car for a nice drive before work today, following the Fox river South on Route 31 into Aurora, Illinois.  About 7 miles from home, the engine began to sputter in 4th gear at 45 mph.  Easing off of the throttle and downshifting seemed to help, and I started questioning my new ignition.  The tachometer was bouncing a lot, but oil pressure, temp etc indicated normal.  After stopping for some construction, the engine died and would not start.  I am waiting for a tow and figured I might as well write a blog post.

I am suspecting a clogged fuel filter or strainer.  I left home without my tool bag so there was not much that I could do on the side of the road (my fault of course).  I had a new filter in my trunk but without at least a screwdriver it didn't matter.

Wayne, IL
Stranded.
After waiting two hours I went to get a cup of coffee. 
  
The tow truck finally arrived at just before 5:00.

Tuesday, November 24, 2015

New garage lighting

I knew that the lighting in my garage was insufficient, but it really hit home when I found the wire that I had broken a week earlier.

The other day, while shopping at Costco for Thanksgiving dinner, I purchased a couple LED shop lights.  Today I removed the single bulb light socket from the ceiling, added a couple of square boxes with duplex receptacles and hung the lights.

Let's just say I can see clearly now!  The light fixtures are made by Feit Electric.  They use 38 watts and have a light output of 3700 lumens with a color temperature of 4000K (cool white).  I paid around $35 per fixture and am extremely pleased with the purchase.


I also moved the positive battery cable to a better spot.

Saturday, November 21, 2015

Broken wire

After installing the radiator and running the engine, it was idling very poorly.  I had adjusted the valve lash and points gap, installed a stock air filter (ditching the K&N).  The plugs were soaked with gasoline, indicating either weak spark or a fuel control problem.

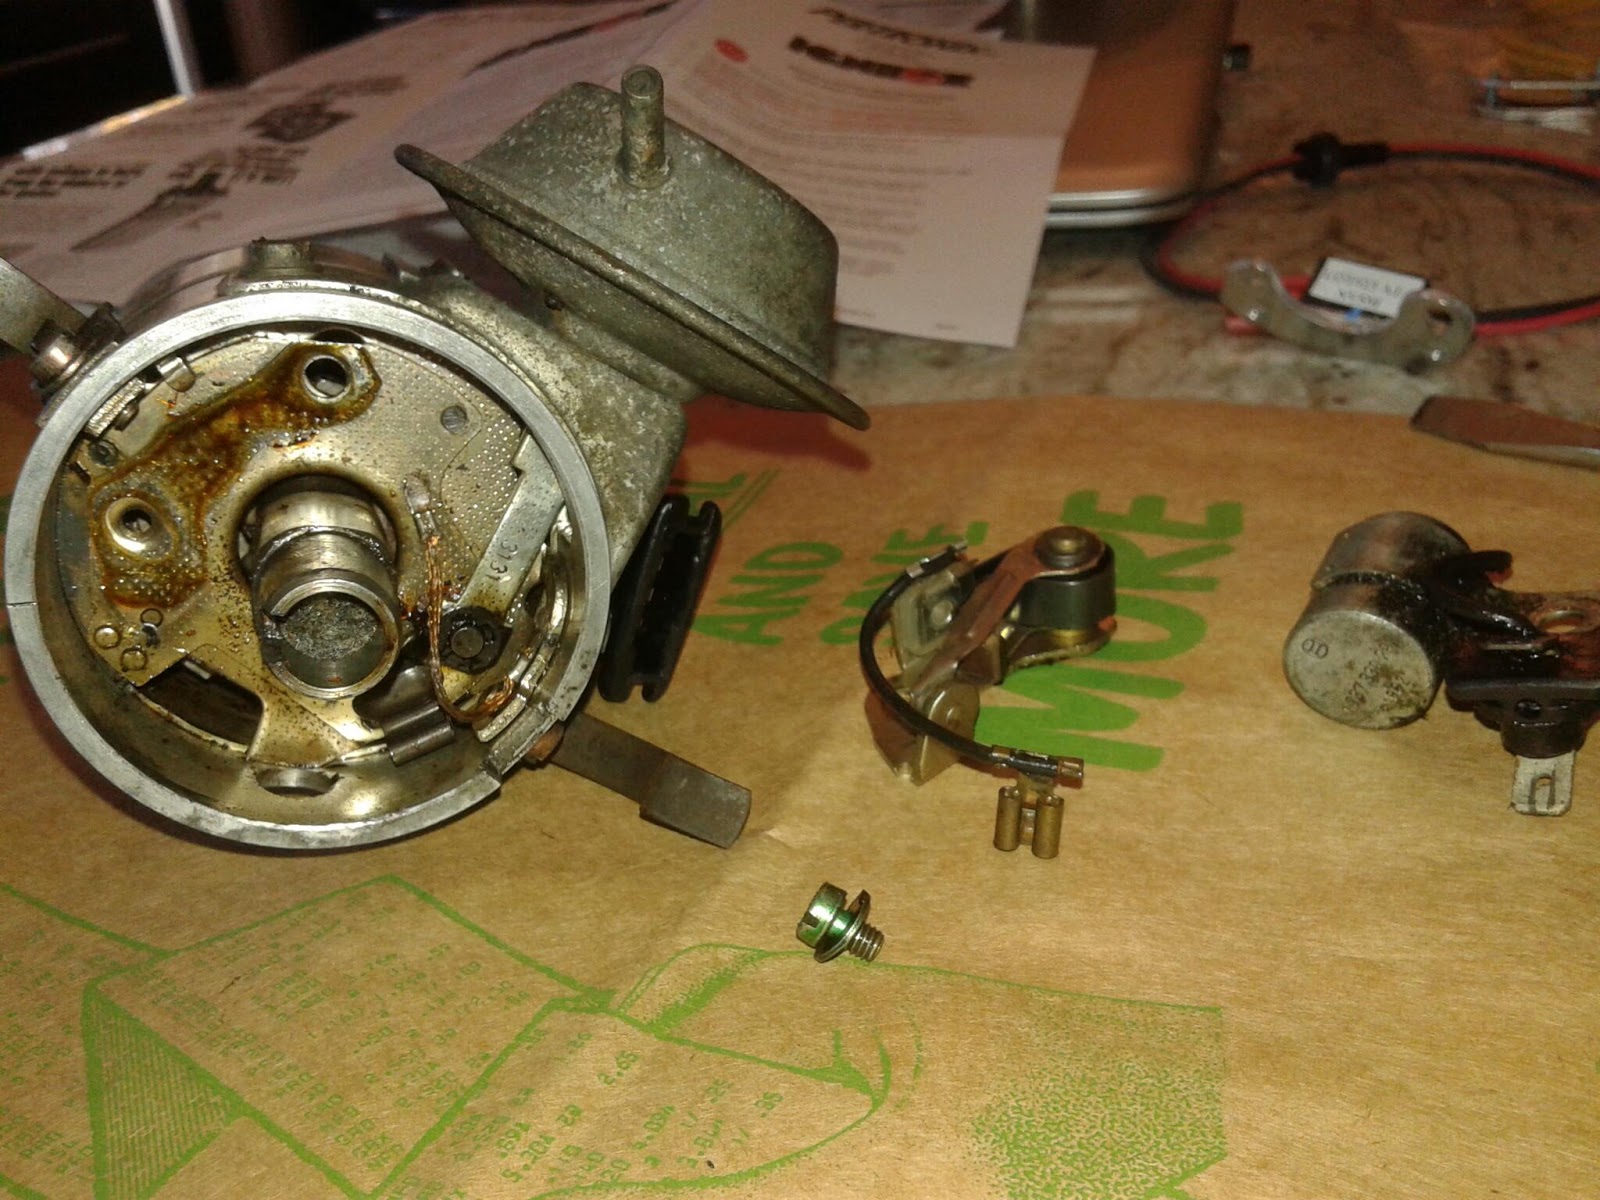
I spent a few days chasing the possibility of an ignition bug, after breaking a plug wire and trying to set the points gap back to how I found it.  Upgrading to electronic ignition eliminated the points and condenser, and the plugs were still fowling with gas.  I put the K&N back on, which was no help.  I was beginning to think that I had somehow messed-up the valve adjustment.

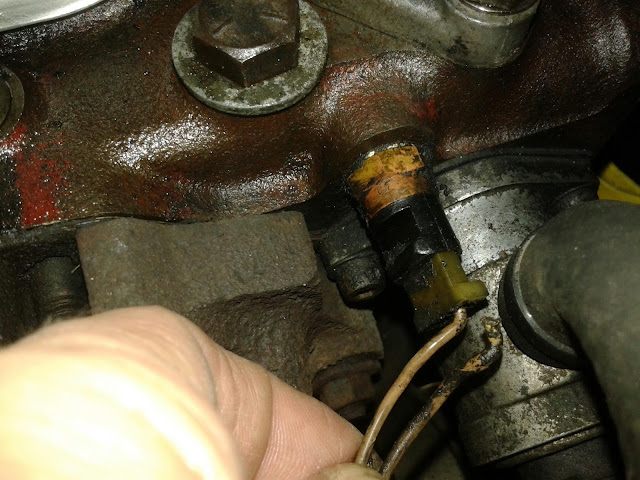
Yesterday, instead of pulling the valve cover to recheck my adjustments, I made a quick inspection around the engine.  I had (previously) noticed a couple of wires that were too close to the exhaust manifold and tied them away.  I checked those wires and found that I had broken one of them.  They provide a variable resistance signal to the fuel injection computer which it uses to determine engine temperature to adjust the length of time the injectors stay open.  Bingo!


These were the only small enough female spade connectors that Autozone had.
A decent but temporary repair.
The car runs great now, but it looks like the test drive might have to wait.  :-( 

Thursday, November 19, 2015

Swapped points and condenser for electronic ignition

Today I received the parts from IPD:  plug wires, cap and rotor, and a Pertronics ignition kit.  I removed the distributor to do the upgrade to electronic ignition, and found just a piece of the mounting gasket.  The hardest part of the upgrade was getting the grommet to seat properly.  I had to trim one of the connectors to get it through the hole, and the red wire was not long enough to reach the coil in its current location.  Eventually I might relocate the coil, but for now I added a jumper to allow for enough slack.


One connector fit through the hole.  With that wire in the way, the other was too tight.
The grommet was a pain to install.

Setting the air gap with the included feeler

Tuesday, November 17, 2015

Reunited car with a previous owner

Today I met with Frank, who had owned the car from 1994 until 2013.  He purchased it as a graduation present for his son, lucky kid!

Frank gave me some pictures which were taken during body work, which will be very helpful in my future efforts.  He also gave me a copy of a paper that his daughter had written about the car, a great piece of the car's history.


Saturday, November 14, 2015

Testing the differential for limited-slip

I found the ID plate on the differential (driver's side forward side), cleaned it off and took a picture of it.  I could not find much information online referencing the ID information.  It is a 4.3-1 non-limited-slip rear end, from what I can tell.  Limited slip differentials have wet-clutches and require oils approved for use with wet clutches.


ID plate
4.3-1 Ratio    -    PartNo 255687    -    Fabr No 10789

Removed grill and installed stock air cleaner

Removing the grill on this '71 was a bit of a pain, compared to my '66.  The 1800s had four screws, simple.  This 1800e has a bunch of clips holding on its plastic grill.  I had to use a flat blade screwdriver and a pair of duck-bill pliers to remove the clips.  For 44 year old plastic, the grill is in great condition.


removing the clips was tricky; I had to pry with the screwdriver while pulling with pliers.


I found that the two ends came out first and then the top center clip was able to drop out.
K&N filter
Stock air cleaner from Don at p1800.com

Friday, November 13, 2015

Installed ebay valve cover etc

Kyle was of from school today. We got up early, rechecked the valve lash then cleaned up the mating surface and installed the 'new' valve cover.

After adding oil to the engine and distilled water to the radiator, we connected the battery and cranked the engine.  It started right away but was idling very poorly.  I tried to adjust the timing with the strobe, but it still sounded like it was missing on a cylinder.  I moved the strobe trigger to each wire and found number four was the culprit.  While disconnecting the plug wire, it fell apart.

I had planned to upgrade to IPD wires eventually, so getting new wires locally would be a waste of money.  I decided to order a set of wires from IPD, and added a cap, rotor and EI kit.  They shipped today.

Eventually we'll get a cast aluminum valve cover, until then this will do.

Thursday, November 12, 2015

Installed new (old) radiator, new hoses

The radiator was a breeze to reinstall, since I forgot to install the cooling fan on the front side of it.  Rex Radiator had painted the whole thing after installing the new core, so I used acetone to remove paint from the hose nipples.  I had ordered the lower hose from Don Thibault at p1800.com because the only replacement they have at the parts stores is a flex hose.  The upper hose was easy to get, but had to be trimmed on both ends.

Notice there's no bolts holding the valve cover; I'm waiting for a valve cover from eBay.
I changed the routing of the overflow hose, adding a foot but reducing the bends.
The formed lower hose is a huge improvement over the universal one that it replaced.

Valve Lash Check / Adjust, etc.

I just finished the valve lash adjustment; the exhaust valve on cylinder # 1 was way too tight.  It's possible that I misinterpreted that valve because it was the first one I checked.  I'm not sure if I took the slop out of the rocker before trying the feelers.  After installing new spark plugs, I cleaned and lubed the distributor and set the point gap.  The gap was a little tight.


I installed new spark plugs, since I had the old plugs removed

Tuesday, November 10, 2015

Painted and installed fuel pump blanking plate

There was a pressure sending unit sticking out of the fuel pump blanking plate, not connected to anything.  I asked Mr Thibault to send me a blanking plate, which arrived today along with other parts.  It looked like it came off of an engine that had sat outdoors for a while, so I cleaned it up and painted it with some high temp paint that I had around.

Not sure what this sending unit was for, but it wasn't stock
Quick paint job
I thought about getting a fuel pump to mount, and use for a washer fluid pump; looks doable.
Looking forward to heat-curing the paint.

Radiator back from Rex

This morning I picked-up the radiator from Rex in Bensenville.  The paint job was disappointing, but I am mostly concerned with functionality.  After all, it's a radiator.  The UPS guy dropped off a box from Don Thibault later in the afternoon, with the lower radiator hose among other stuff.
the paint was still tacky when I picked it up
Have parts but no time.

Monday, November 9, 2015

Investigated the no-heat issue


Since the radiator is getting a new core, I was thinking about pulling the heater core to inspect / test it prior to refilling the cooling system.  We had no heat on our trip home from Maryland, even after adding a thermostat and topping up the coolant.  This morning I crawled under the dash to do a quick inspection of the rest of the heating system.  I was happy to find the control valve had become disconnected from its control cable, which is a likely cause!  I have decided to leave the heater core in place and hope for the best, since we actually do not expect to need heat from April through October.


While under the dash, I also found a broken control cable for the Floor damper.

Thursday, November 5, 2015

Cleaned Engine and Removed Radiator

This morning I degreased the engine and then sprayed some Gunk engine shine on it.  I read about spraying Armor-All 'tire wet' after cleaning, but found the Gunk engine shine next to the degreaser and decided to try that.

I don't mind the look of an oily engine, but would prefer not to work on one.
It cleaned-up nicely

Happy that the engine started and ran fine after its bath, I drained the cooling system and removed the radiator.  I brought the radiator to Rex Radiator in Bensenville, IL to have them recore it.  They will also add a hole with a bung for the electric fan sensor switch.  The sensor had been stuck into the upper hose nipple with gobs of RTV, not a good idea but common from what I understand. 


The box on the left is the fan controller.
Blue RTV sealed this bad idea, but there must be a better way.
Radiator gone.

Monday, November 2, 2015

Pictures on lift

I brought the car to a muffler shop to find out what it would cost to repair the leaks.  They were kind enough to let me snap a few pictures of the undercarriage.


The body survived the lift; next time it should have at least one new outrigger


I wanted to drive the car to work before winter, so why not on my first day back from the trip?  After work that night, I was showing the car to my friend Ron and he noticed a puddle underneath which turned out to be coolant.  The radiator core had spring a leak, thank God timing was on my side (7 miles from home).